If you share your computer with others or you just want to be cautious of prying eyes, you may want to password protect files or folders so that no one can see their contents unless they know the password. While there are plenty of good utilities out there that will add password protection to files, my favorite is to use a zip program that has a password capability. The free 7-Zip program fits the bill nicely.
If you don't have 7-Zip already, download it from http://www.7-zip.org/download.html and install it. By default, it will modify your File Explorer's Context menu so that when you right-click a file or folder the 7-Zip menu item will appear: (See Figure 1.)
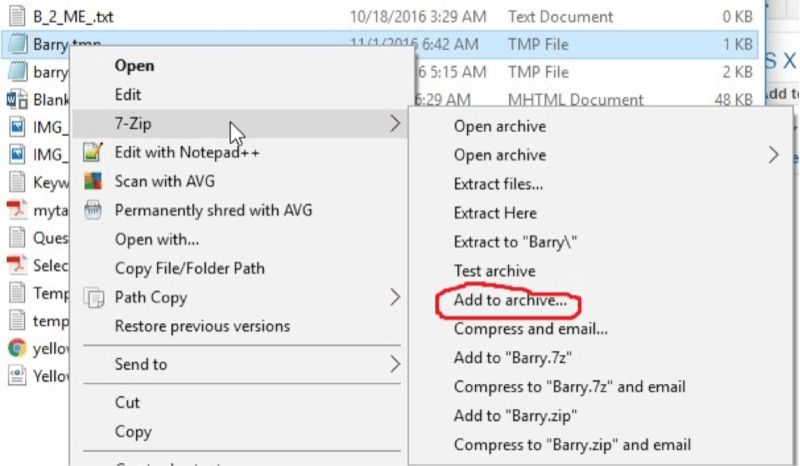
Figure 1. The 7-Zip Context menu.
Near the middle of the rightmost context menu you see the item "Add to Archive." Click this and you'll be presented with the following window: (See Figure 2.)
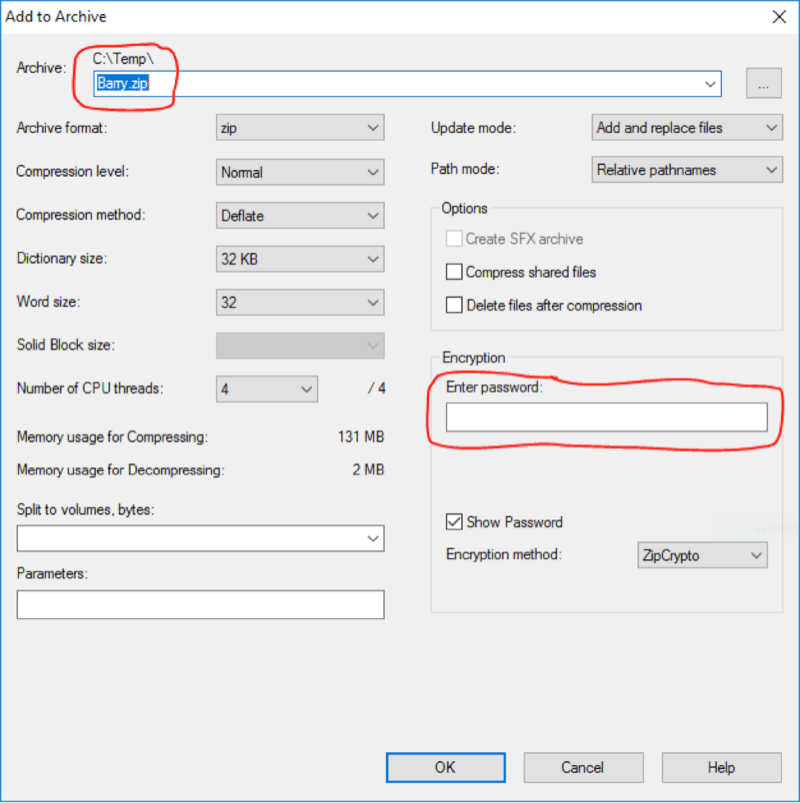
Figure 2. Preparing to zip your file.
I've circled two important areas in the above figure. The top one shows the folder and name of the zip file that's about to be created. You can change this if you like. The second circled area is where you enter the password for the zipped file. You can either show the password as you type or have it just represented by a mask by clicking the "Show Password" checkbox just below. Once you've entered your password, click OK to create the zip file. Once you've done that, you're returned to File Explorer, where you see your newly created zip file: (See Figure 3.)
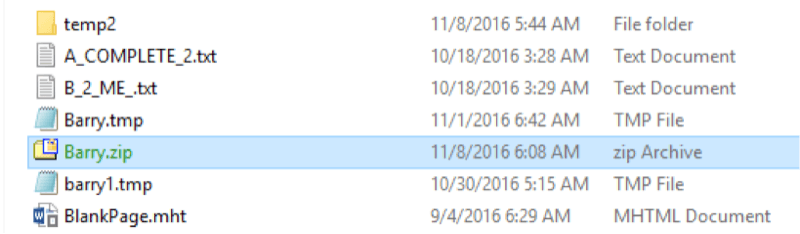
Figure 3. File Explorer's view of your zip file.
At this point you should double-click the zip file to ensure your original file is in there, and once that's verified you should delete your original file since it is not password protected.
![]() This tip (2000) applies to Windows 10.
This tip (2000) applies to Windows 10.
In todays on-the-go lifestyle, we tend to have multiple electronic devices. Easily being able to connect our devices can ...
Discover MoreAre you frustrated by your desktop icons moving around whenever you change your screen resolution or use Remote Desktop? ...
Discover MoreIf you need to search the contents of files fast, Agent Ransack is a tool worth having. It searches through multiple ...
Discover MoreThere are currently no comments for this tip. (Be the first to leave your comment—just use the simple form above!)
Copyright © 2025 Sharon Parq Associates, Inc.

Comments