Windows Update is a feature built into Windows that can be used to keep your computer current with the latest patches released from Microsoft. You have to be connected to the Internet for Windows Update to work. You can have the updates applied automatically, or install them manually after they're downloaded. However you use it, Windows Update is vital to keeping your computer running safely and efficiently.
To launch Windows Update with Windows 7 or Windows 8, display the Control Panel, click the System and Security link, then click the Windows Update link. (See Figure 1.)
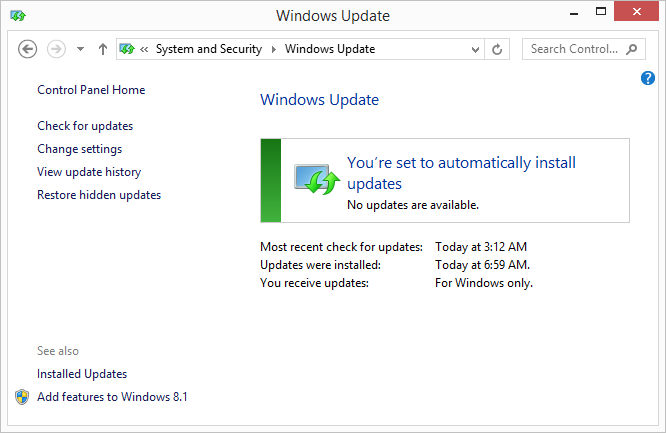
Figure 1. The Windows Update dialog box (Windows is up to date).
As this figure shows, my computer is up to date with the latest Microsoft patches. If it were not, the dialog box would include some sort of notice that updates were available. How the notice appears depends on the version of Windows you are using and the type of updates available. (See Figure 2.)

Figure 2. The Windows Update dialog box (updates available).
To launch Windows Update with Windows 10, type "Windows Update Settings" (without the quotes) in the search box and press Enter. Windows displays the Windows Update screen. (See Figure 3.)
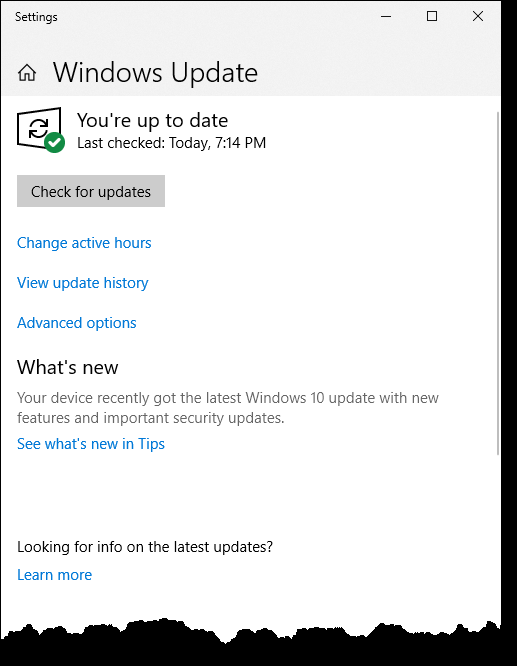
Figure 3. The Windows Update section of the Settings app (Windows is up to date).
As this figure shows, the computer is up to date with the latest Microsoft updates. If it were not, there would be a notice that there are updates available. (See Figure 4.)
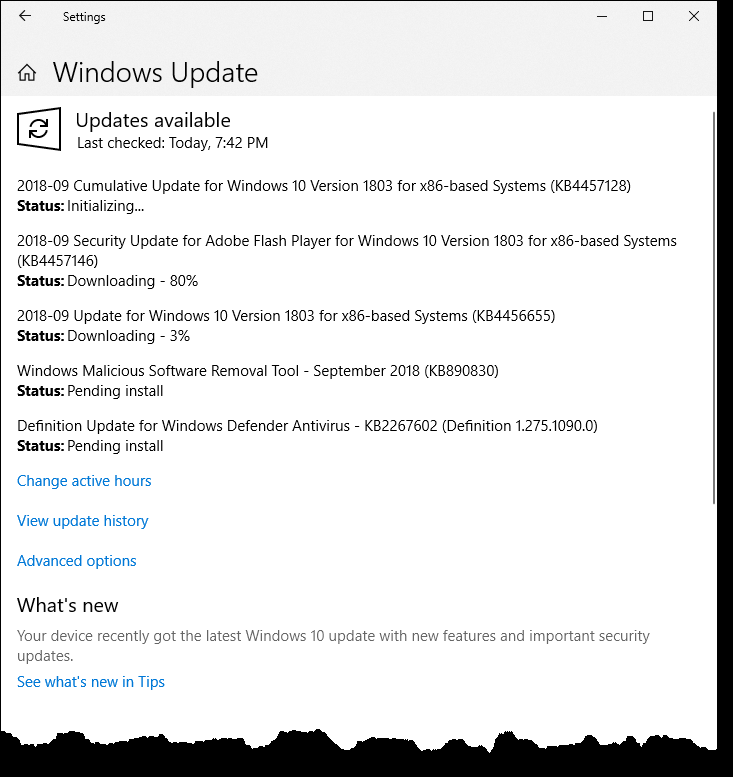
Figure 4. The Windows Update section of the Settings app (updates available).
If you are being told to install updates, click the button or link to install the updates. Windows downloads the latest updates from one of Microsoft's servers and attempts to install them. Some updates require that you reboot your computer after they're installed, but others do not. You will be told which is the case after your updates are installed. (Because restarting your system might be necessary, you might want to close any other programs you are using so you don't run the risk of losing any data.)
You can change how Windows Update works with Windows 7 or Windows 8 by clicking the "Change Settings" link on the left side of the dialog box. Windows displays the Change Settings dialog box. (See Figure 5.)
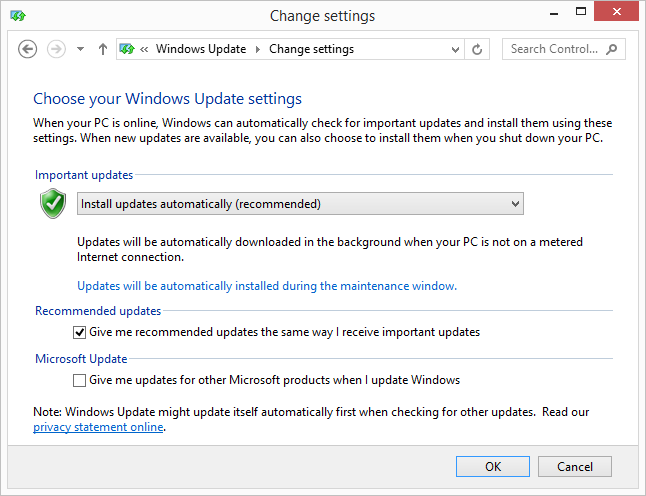
Figure 5. Windows Update dialog box (change settings).
There are three sections to this dialog box. The first is how to deal with what Microsoft considers to be "Important Updates"; the second is how to deal with what Microsoft considers to be "Recommended Updates"; and the third section varies based on whether you are using Windows 7 or Windows 8. In Windows 7 it simply tells the system whether all users are allowed to install updates (versus only the administrator); in Windows 8 it controls whether updates for other Microsoft products are installed or not via update.
There are actually three steps involved in using Windows Update:
By pulling down the drop-down list under the "Important Updates" section, you can specify whether your computer should perform one, two, or all three steps automatically.
You can also indicate when you want the update process to occur, but how you do it depends on the version of Windows you are using. If you are using Windows 7, you can specify an update time directly in the Change Settings dialog box. If you are using Windows 8, you'll need to click the "Updates will Be Automatically Installed During the Maintenance Window" link to specify a time.
Changing how Windows Update works with Windows 10 is quite a different process than with earlier versions of Windows. From the Windows Update screen click Advanced Options and Windows displays the Advanced options screen. (See Figure 6.)
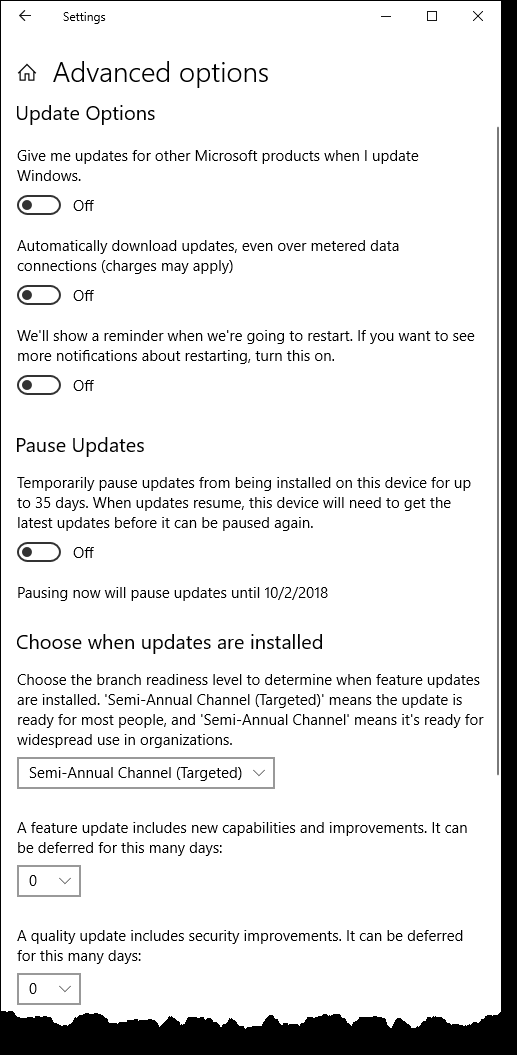
Figure 6. The Advanced options section of the Settings app for Windows Update.
You can turn on or turn off the following Update options:
You also have the option to temporarily pause updates from being installed on your computer or device. Another option is to choose when updates are installed. You have the option to choose the branch readiness level (Semi-Annual Channel (targeted) or Semi-Annual Channel) to determine when feature updates are installed. A feature update can be deferred from 0 to 365 days. A quality update, which includes security improvements, can be deferred from 0 to 30 days.
If you're ever curious about your updates, click the View Update History link at the left side of the Windows Update dialog box (Windows 7 or Windows 8). When you click this link, Windows shows you a complete recitation of what updates have been made to your system. (See Figure 7.)
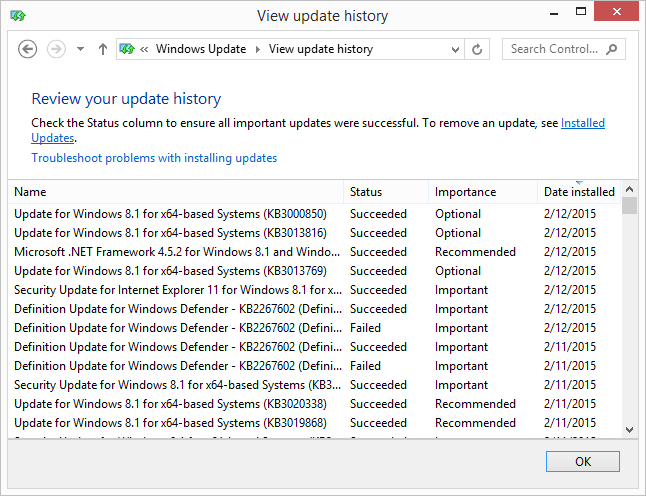
Figure 7. View Update History dialog box.
Here you can see what all updates were applied, when they were installed, and whether they were considered Important, Optional, or Recommended. You can also see the name of the update and whether it was successfully installed. If you find that an update (especially an important one) was not installed successfully, you can begin the troubleshooting process by clicking the Troubleshoot link.
To display the View Update History screen with Windows 10, click View Update History on the Windows Update screen. (See Figure 8.)

Figure 8. View Update History window.
On my computer, there are four update sections that you can scroll through: Feature Updates, Quality Updates, Definition Updates, and Other Updates. Within each section, you will see what updates were applied, when they were installed, and whether you need to restart the computer to complete the installation of the updates.
![]()
![]()
![]() This tip (12309) applies to Windows 7, 8, and 10.
This tip (12309) applies to Windows 7, 8, and 10.
The capabilities of apps changed with Windows 10. What, exactly, are modern apps and how are they different from earlier ...
Discover MoreOne of the many functions of the Windows Task Manager is to allow you to control processes running on your system. If you ...
Discover MoreDo you turn your computer on and off all the time? Do you really know if this is good for your computer or not?
Discover MoreThere are currently no comments for this tip. (Be the first to leave your comment—just use the simple form above!)
Copyright © 2026 Sharon Parq Associates, Inc.

Comments