It is not unusual for a single Windows computer to be used by multiple people. Normally each user has their own user account defined on the computer. At some point you may need to get rid of a user account. For instance, it could be that a user no longer works at your company or perhaps the user simply no longer uses your computer.
You can get rid of an existing user account (as long as you have administrator privileges) by following these steps if you are using Windows 10:
- Type "Control Panel" (without the quotes) in the Search box and press Enter. Windows displays the Control Panel.
- At the right side of the screen, click User Accounts.
- Under the User Accounts heading, click Remove User Accounts. Windows asks you to choose which user you want to change. (See Figure 1.)
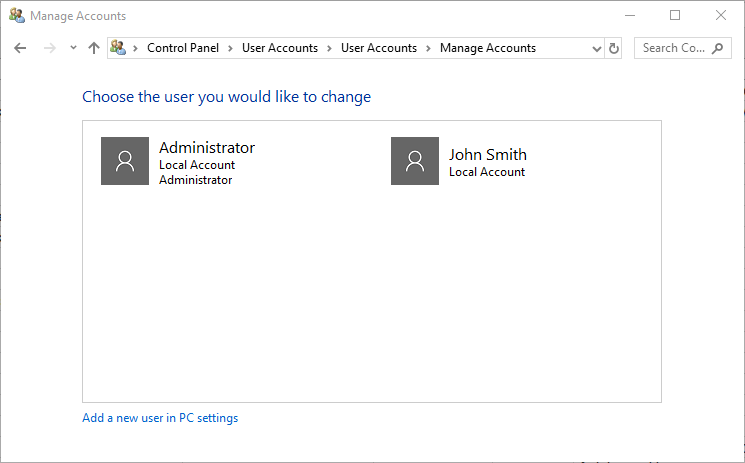
Figure 1. Choose the user you would like to change.
- Click the account you want to delete. Windows displays the Make Changes to (name of user's) Account screen. (See Figure 2.)
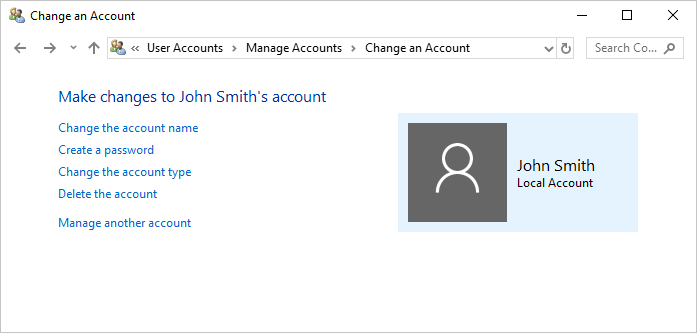
Figure 2. The User Accounts screen
- At the left side of the screen click Delete the Account. Windows asks if you want to keep the files associated with the account.
- Click either Delete Files or Keep Files, depending on your preference. Regardless of which button you click on, Windows asks you to confirm that you really want to delete the account.
- Click Delete Account.
If you are using Windows 7, follow these steps:
- Click Start and then click Control Panel. Windows 7 displays the Control Panel.
- At the right side of the screen, under the main heading of User Accounts and Family Safety, click Add or Remove User Accounts. Windows 7 displays the Manage Accounts screen.
- Click the account you want to delete. Windows 7 displays the Change an Account screen. (See Figure 3.)
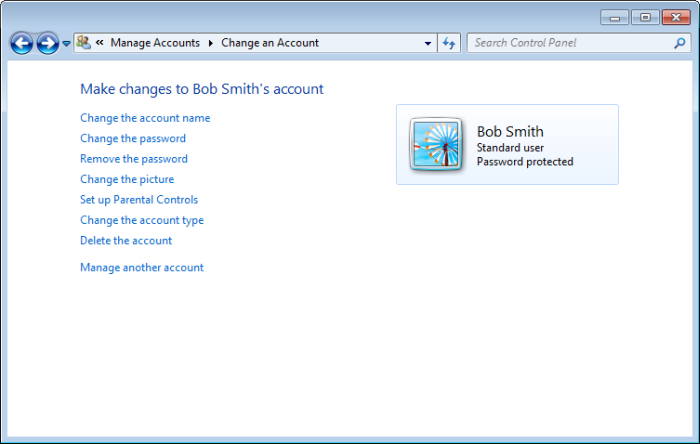
Figure 3. The Change an Account screen.
- At the left side of the screen click Delete the Account. Windows 7 asks if you want to keep the files and settings associated with the account.
- Click either Delete Files or Keep Files, depending on your preference. Regardless of which button you click on, Windows 7 asks you to confirm that you really want to delete the account.
- Click Delete Account.

 This tip (10714) applies to Windows 7 and 10.
Author Bio
Allen Wyatt
With more than 50 non-fiction books and numerous magazine articles to his credit, Allen Wyatt is an internationally recognized author. He is president of Sharon Parq Associates, a computer and publishing services company. Learn more about Allen...
Controlling Repagination in Macros
Want to turn off document repagination while your macro does its work? Here are two approaches you can use.
Discover More
Forcing Dates Forward
Want to push a date to some pre-defined day of the month? Here's some ways to force the issue.
Discover More
Moving Text without Affecting the Clipboard
Want a quick and easy way to move text (or other document elements) from one place to another in your document? Check out ...
Discover More
Changing an Account's Picture
You may want to customize your account so that it uses a picture of your own choosing. This tip tells you how to change ...
Discover More
Adding a Password to a User Account
Passwords on user accounts are a great way to enhance security for a computer system. Here's how you can add a password ...
Discover More
Using the Sign Out Feature
To switch users without going through the lengthy reboot process, just sign out. It's not too obvious how to do this, but ...
Discover More
Comments