Process Explorer comes to us from the folks at Sysinternals, so it's very well designed and implemented. It has so much functionality built into it that it would require many tips to do a decent job covering it. I just introduce it here and give you a high-level overview of a few things you can do with it so that you can add it to your toolbox.
Process Explorer is a GUI-based utility that allows you to look at and, to some degree, manipulate the processes on your system. When you first launch it, the main screen can be quite overwhelming. (See Figure 1.)
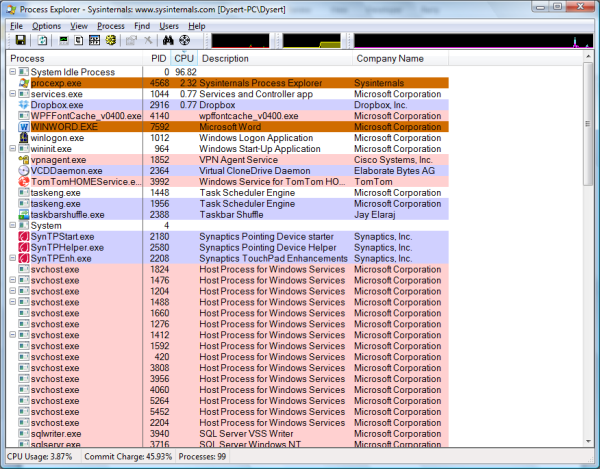
Figure 1. Process Explorer's Main Screen.
By default Process Explorer displays five columns: the process name, its PID (process ID), the CPU percentage it's using, the process' description, and the company name. By right-clicking a column header you can select several other columns that can be displayed.
You can sort the display by any column. I usually have the display sorted by CPU so that the most CPU-intensive processes appears near the top. Sometimes, though, you may want to sort by process name (especially if you're interested in a particular process) or by another column that you've added. To sort by a column, just click that column's header. The display is then sorted in ascending order by that column. Another click of that column's header causes the display to be sorted in descending order by that column.
Process Explorer can also run in two-pane mode. To bring up the second pane, click View | Show Lower Pane. The display is then split horizontally and the new pane appears empty. To see meaningful data in the bottom pane, all you need to do is click a process in the top pane. (See Figure 2.)
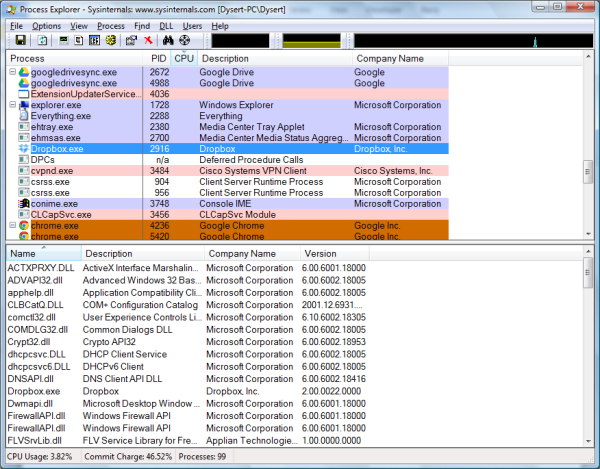
Figure 2. Process Explorer's two-pane view with a process selected.
Basically the bottom pane provides more information about whatever process you have selected in the top pane. Since processes can require and use other processes, this is a very helpful way to figure out the entire scope of what a process is using on your system.
The Process Explorer feature that I use the most is the Find command. Have you ever tried to delete a file only to be told that the file is in use by another program? The Find command locates the process holding the file open so you can decide what to do about it. For example, say that I have a file called "Temp.tmp" that I'd like to delete. When I try, though, I get the error message that it's in use by another program. (See Figure 3.)
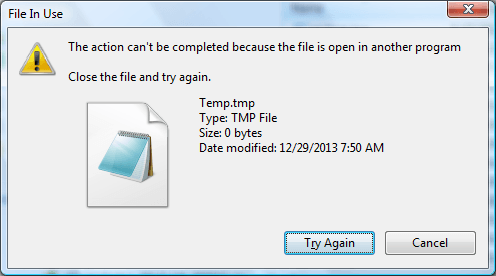
Figure 3. File In Use error message.
Of course, the dialog box indicating that Temp.tmp is in use doesn't provide any indication of which program has the file open. With Process Explorer this is no longer a problem. I simply click the binoculars icon (the Find command), enter the name of the locked file, and click Search. (See Figure 4.)
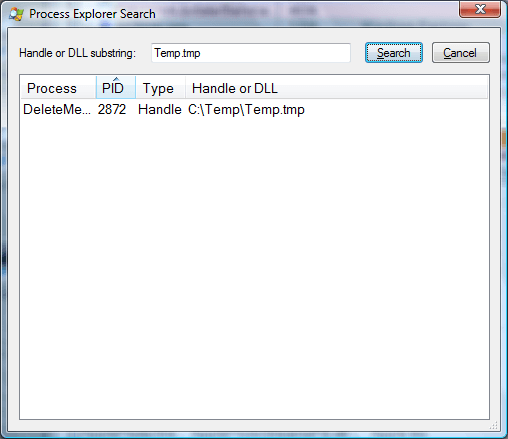
Figure 4. Searching for the locked file.
I quickly see that the process holding the file open is "DeleteMe" and its PID is 2872. I can now do further research to determine how to get the file released or what the ramifications might be if I simply kill the process holding it open.
Process Explorer is a free download and can be retrieved at this Microsoft site:
http://technet.microsoft.com/en-us/sysinternals/bb896653.aspx
![]()
![]()
![]() This tip (12989) applies to Windows 7, 8, and 10.
This tip (12989) applies to Windows 7, 8, and 10.
If you need to search the contents of files fast, Agent Ransack is a tool worth having. It searches through multiple ...
Discover MoreDistractions can cause unfortunate delays in completing projects and tasks. With Focus Assist you can easily block out ...
Discover MoreCutePDF Writer is an extremely versatile utility that allows you to create PDF files from virtually any application that ...
Discover MoreThere are currently no comments for this tip. (Be the first to leave your comment—just use the simple form above!)
Copyright © 2025 Sharon Parq Associates, Inc.

Comments