Getting Rid of the Lock Screen
Written by Allen Wyatt (last updated November 23, 2020)
In Windows, the Lock Screen is what you first see when you get your computer's attention. It serves the same function as the introductory screen you see when you activate your phone or tablet. It typically contains a picture, the time, the date, and little else.
The Lock Screen can be very helpful when you are working with a phone or tablet; it provides a degree of protection to a device that is easily misplaced, bumped, or jarred. (The biggest plus in my book—the Lock Screen on a phone helps prevent "pocket dialing" which can be bothersome and, at times, embarrassing.) If you are using Windows on a desktop computer, though, you may want to get rid of the Lock Screen, as it serves very little practical purpose.
To turn off the Lock Screen, you'll need to use the Registry Editor. If you've used Windows for a few versions, you may already be familiar with the registry editor (or policy editor as it is known in earlier versions of Windows). Rest assured that the familiar interface is still buried within Windows, waiting for you to dig it out. Follow these steps:
- Right-click the Start button and select Run from the context menu. (You can also type "Run" without the quotes in the search box to the right of the taskbar and press Enter.) Windows displays the Run dialog box.
- Type regedit in the box and click OK. A User Account Control window may be displayed. If so, click on the Yes button to proceed. Windows opens the Registry Editor.
- Use the navigation pane (left side of the screen) to navigate to Computer | HKEY Local Machine | Software | Policies | Microsoft | Windows. (See Figure 1.)
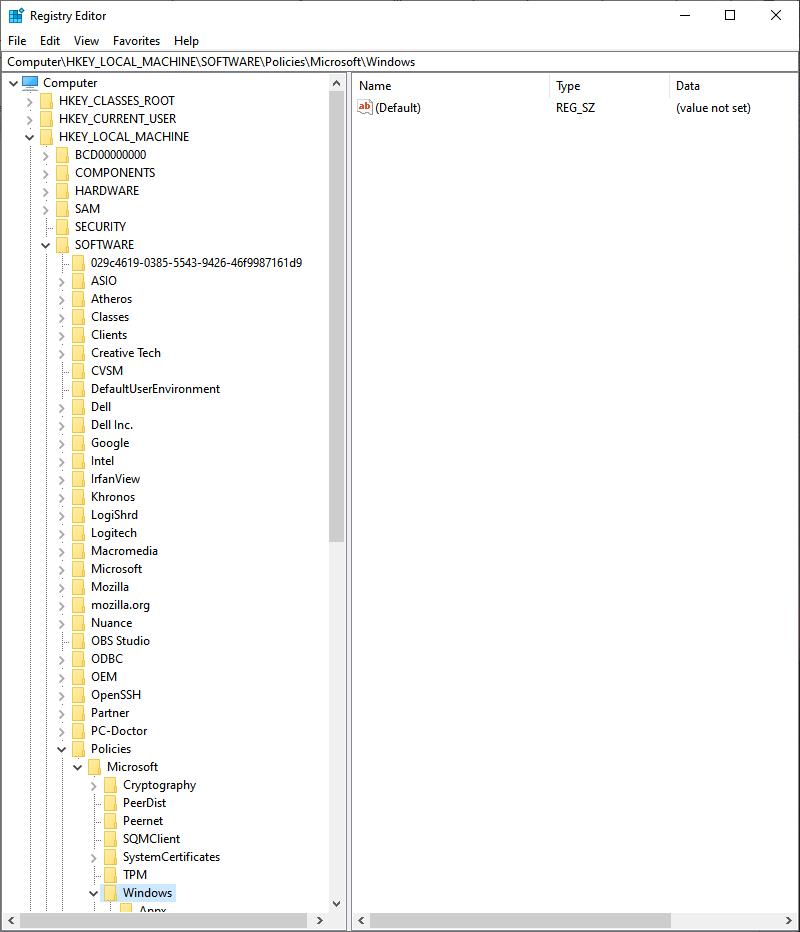
Figure 1. The Registry Editor.
- Right-click on Windows in the navigation pane and click on New | Key from the context menu. A new folder (New Key #1) is created and appears in the Windows folder. Rename it to Personalization.
- Right-click in the right pane of the Registry Editor while in the Personalization folder and select New | DWORD (32-bit) Value. A new item is added to the right pane of the Registry Editor titled, New Value #1. Rename this to NoLockScreen. (See Figure 2.)
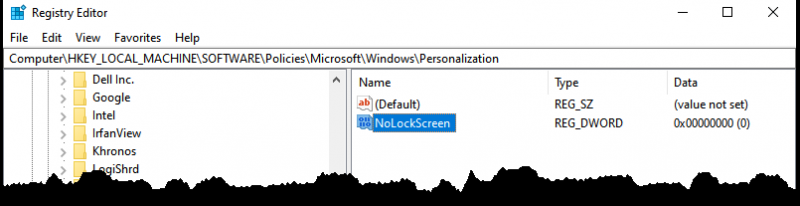
Figure 2. New Registry Editor item renamed as NoLockScreen.
- Double-click on NoLockScreen to open the Edit DWORD (32-bit) Value dialog box. (See Figure 3.)
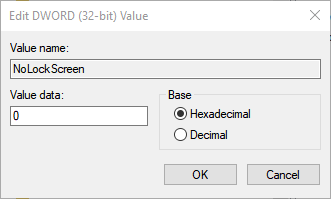
Figure 3. The Edit DWORD (32-bit) Value dialog box.
- Under Value Data, change the value from 0 to 1 and click OK.
- Exit out of the Registry Editor and restart your computer.
You will no longer see the lock screen when you get your computer's attention. Remember that turning off the Lock Screen doesn't mean that people can get into your system without your say-so. Windows still keeps the login screen in place, even if the Lock Screen is disabled. In other words, someone will still need to know your password in order to start using your system.
Follow these steps if you are using Windows 8:
- Display the Charms bar at the right side of your screen. (Do this by swiping right-to-left or moving the mouse to the very upper-right or lower-right of the screen. You can also accomplish this step by pressing Win+C.)
- Click Search. Windows displays the Apps screen with the Search box in the upper-right corner of the screen.
- Type gpedit.msc and press Enter. Windows locates and runs the Local Group Policy Editor.
- Use the navigation pane (left side of the screen) to navigate to Computer Configuration | Administrative Templates | Control Panel | Personalization.
- At the right side of the screen, double-click the Do Not Display the Lock Screen entry. Windows displays the Do Not Display the Lock Screen dialog box.
- Click the Enabled radio button. (This sounds backwards, I know—you are not enabling the Lock Screen, you are enabled the "Do Not Display" property of the Lock Screen.)
- Click OK to close the Do Not Display the Lock Screen dialog box. The setting in the Local Group Policy Editor is updated.
- Close the Local Group Policy Editor.
The change is effective immediately; you don't need to reboot your system.

 This tip (12821) applies to Windows 8 and 10.
Author Bio
Allen Wyatt
With more than 50 non-fiction books and numerous magazine articles to his credit, Allen Wyatt is an internationally recognized author. He is president of Sharon Parq Associates, a computer and publishing services company. Learn more about Allen...
Replacing Plain Text with a Hyperlink
Active hyperlinks can be a desired feature in some types of documents. If you want to replace multiple instances of plain ...
Discover More
Missing Page Break Indicator
Enter a page break in Word, and that page break may not appear on the screen as you expect it to appear. This has to do ...
Discover More
Moving Worksheet Tabs to a Different Place
Excel displays worksheet tabs at the bottom of the program window. If you want them displayed at a different place, you ...
Discover More
Comments