The ChkDsk Utility (short for "Check Disk") is a useful part of Windows that allows you to check a given hard drive for problems. A good habit to get into is to run ChkDsk periodically—say, every month or so—to ensure that you catch any disk problems early.
There are two ways to run ChkDsk: through the Windows interface or from the command line.
Running ChkDsk through the Windows Interface
Start by navigating to the disk drive you want to check. (You can navigate to the drive any number of ways, including through Windows Explorer or File Explorer.) Right-click on the drive you want to check and select Properties from the resulting Context menu. Windows displays a Properties dialog box for the drive; you should make sure the Tools tab is displayed. (See Figure 1.)
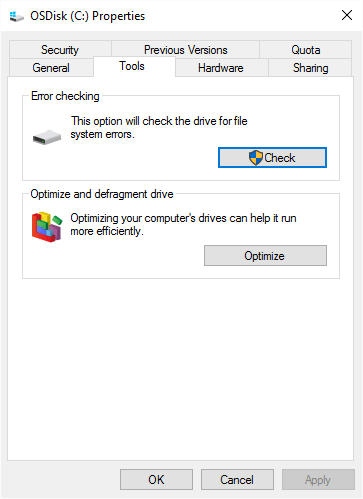
Figure 1. Disk properties.
Next, click on the Check Now or Check button. (The exact wording on the button depends on your version of Windows.) What you see next can vary, depending on your version of Windows. For example, if you are using Windows 7, it displays a dialog box that allows you to set options for how the checking should be done. (See Figure 2.)
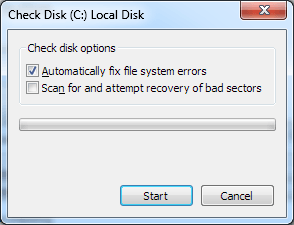
Figure 2. Setting disk check options.
A relatively quick check is done if only the top checkbox is checked. A more thorough (and more time consuming) check is done if you check both checkboxes. After you select your options, click the Start button and the utility will check your disk.
If you are using Windows 10, you instead see a dialog box indicating if a scan is necessary. You can force Windows to do the scan by clicking the Scan Drive option. (See Figure 3.)
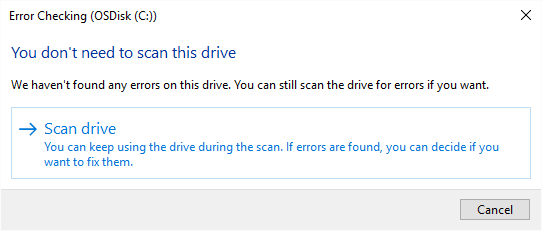
Figure 3. Getting ready to check a drive for errors.
Once a scan is started (regardless of your Windows version), after several minutes you are notified as to the results of the scan.
Running ChkDsk at the Command Line
In order to run ChkDsk from the command line, follow these steps:
ChkDsk /?
This command displays the help screen for ChkDsk. You should immediately see a list of options that you can use with the command. (See Figure 4.)
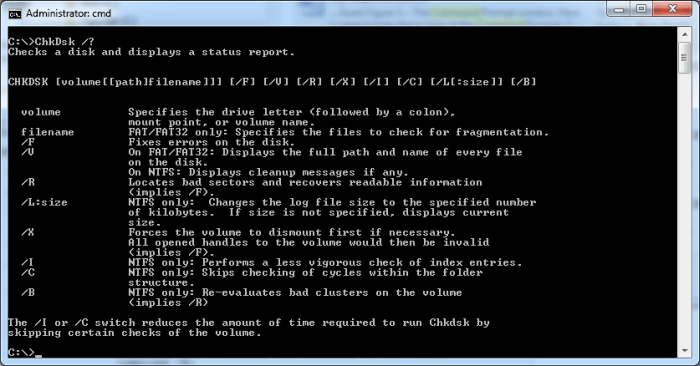
Figure 4. Options for use with ChkDsk.
Note, first of all, that there are quite a few options available with the command-line version of ChkDsk that are not accessible by using the Windows interface. In most instances you can ignore most of the options. (But it is somewhat comforting—and intimidating—to know they are there, available if you are feeling adventurous or wanting to flex your power.)
Assuming you're checking an NTFS volume, invoking ChkDsk with either the /I or the /C switch will result in a relatively quick (though less thorough) scan. A more through scan is performed by using the /R switch. If you invoke ChkDsk without any switches, it performs a relatively quick read-only scan of the disk without trying to fix any errors, although it does report them.
![]()
![]()
![]() This tip (12748) applies to Windows 7, 8, and 10.
This tip (12748) applies to Windows 7, 8, and 10.
It's quite possible to move your system's page file to a different disk. This tip provides the steps you should follow to ...
Discover MoreWhen you format a disk drive, you have the option to specify what file system should be used on that drive. There are ...
Discover MoreThe NTFS file system is at the core of the Windows operating system. This tip explains a bit about it.
Discover MoreThere are currently no comments for this tip. (Be the first to leave your comment—just use the simple form above!)
Copyright © 2026 Sharon Parq Associates, Inc.

Comments