Adding a Printer

Written by Allen Wyatt (last updated December 31, 2018)

Many programs that you may run on your system are designed to create output for a printer. Windows can work with a wide array of printers, but you need to direct the operating system to actually use the printer.

It's pretty easy to add a printer to your system; you start from the Devices and Printers screen which is visible when you click the Start button and then click Devices and Printers on a Windows 7 system. If you are using Windows 10, display the Control Panel and click on View Devices and Printers under the Hardware and Sound heading. You may have to scroll down a bit to find the Printers section. (See Figure 1.)

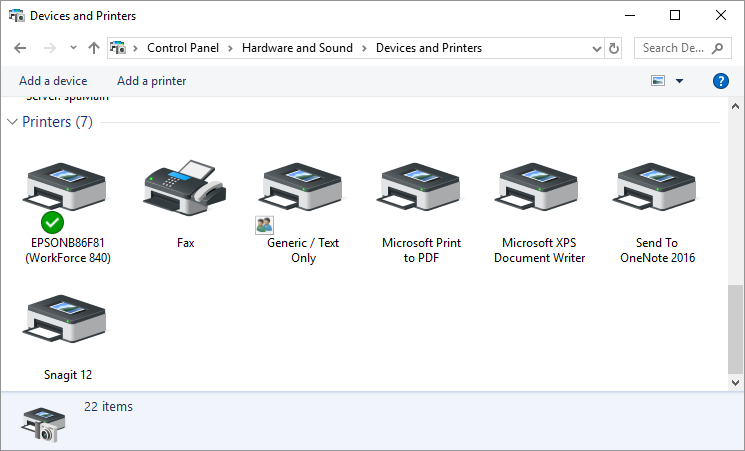
Figure 1. The Devices and Printers screen.

There is a good chance that your Devices and Printers screen already shows a number of different printers defined. If you see one that describes the printer you want to use, then you don't need to add a printer driver. (Makes sense, huh?) If you don't see your printer in the screen, then you will need to add the printer.

Windows classifies printers based on how they are connected to your computer. A printer that is physically connected to your computer is considered a local printer and a printer that is not physically connected is generally referred to as a network printer. The steps you go through to add your printer depend on the type of printer you are trying to connect. If you have a local printer that is connected to your computer using a USB cable, generally all you need to do is turn the printer on and then plug in the USB cable—Windows discovers the printer and takes care of setting everything up. If you, however, have a local printer that is connected using some other type of cable, then you'll need to follow these steps on a Windows 7 system:

  1. At the top of the Devices and Printers screen, click Add a Printer. Windows 7 displays the first step of the Add a Printer wizard. If you are using Windows 10, the system will automatically begin a search for a printer to add to this PC. If a printer is not found, then click on the The Printer that I want isn't Listed link.
  2. On a Windows 7 system, click the Add a Local Printer link. Windows 7 proceeds to the next step of the wizard. (See Figure 2.)
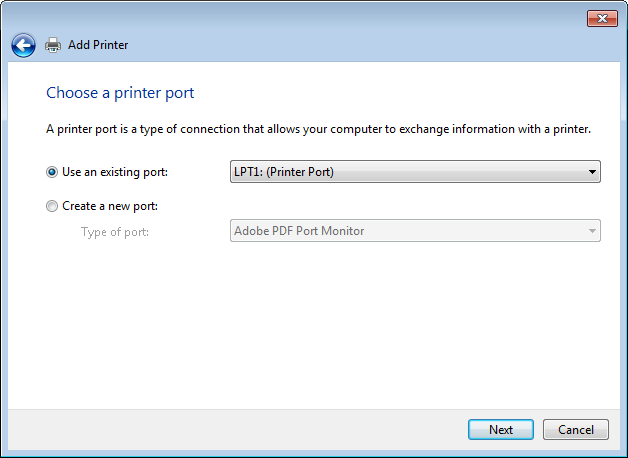
  3. Figure 2. The second step of the Add a Printer wizard.

    On a Windows 10 system, click the radio button next to Add a Local Printer or Network Printer with Manual Settings and click the Next button. (See Figure 3.)

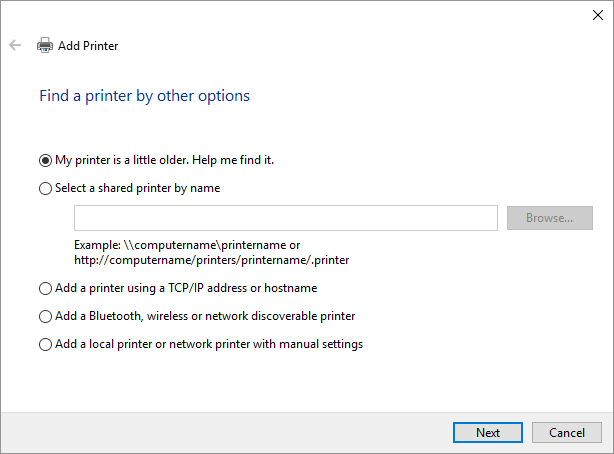
    Figure 3. The Find a Printer by Other Options screen.

  4. Use the controls to specify how your printer is connected to your computer. (This is known as a port in geek speak.)
  5. Click Next. (See Figure 4.)
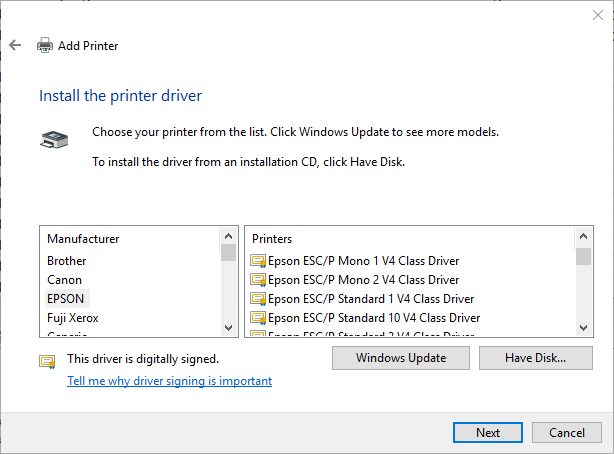
  6. Figure 4. The third step of the Add a Printer wizard.

  7. Pick a printer manufacturer in the Manufacturer list. The Printers list then updates to reflect printers made by the manufacturer you selected.
  8. Pick a printer in the Printers list. Make sure you pick one that exactly matches your model or is compatible with your model.
  9. Click Next.
  10. Enter a name for the printer you are adding. (Windows suggests a name based on the printer model you chose, but you can change it in any way you desire.)
  11. Click Next. Windows installs the printer driver for the printer model you chose and then moves to the next step of the wizard.
  12. Specify if you want to share your printer with other people on your network. (If you don't have a network, don't worry about this step.)
  13. Click Next. Windows informs you that you've successfully added your printer.
  14. Click Finish.

The other category of printer that can work with Windows is a network printer. The steps to add this type of printer are a bit different:

  1. Make sure that the printer you want to add is turned on and that, if applicable, your computer is connected to the same network the printer is connected to.
  2. At the top of the Devices and Printers screen, click Add a Printer. Windows 7 displays the first step of the Add a Printer wizard. If you are using Windows 10, the system will automatically begin a search for a printer to add to this PC. If a printer is not found, then click on the "The Printer that I want isn't Listed" link.
  3. Click the Add a Network, Wireless, or Bluetooth Printer link (Windows 7) or Add a Bluetooth, Wireless or Network Discoverable Printer (Windows 10). Windows proceeds to the next step of the wizard and starts looking for network printers. (See Figure 5.)
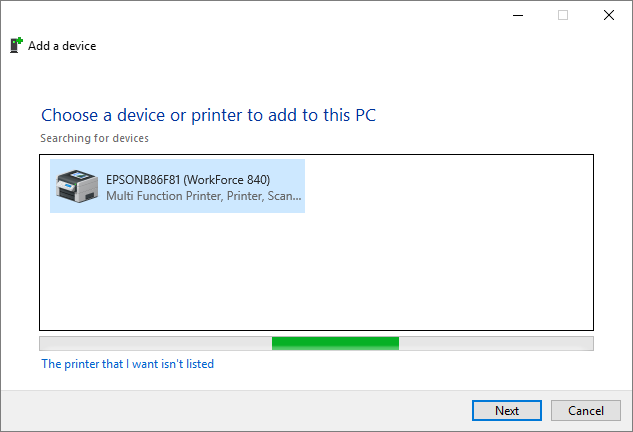
  4. Figure 5. The add a network printer step of the Add a Printer wizard.

  5. When Windows has finished searching for available printers, click on the name of the printer you want to add to your system.
  6. Click Next. Windows attempts to connect to the printer.
  7. Enter a name for the printer you are adding. (Windows suggests a name based on the printer model you chose, but you can change it in any way you desire.)
  8. Click Next. Windows installs the printer driver for the printer and informs you that you've successfully added your printer.
  9. Click Finish.

You should note that just because Windows can detect network printers doesn't mean that you will be able to connect to each of those printers. In step 5, when Windows attempts to connect to the printer, it may be unsuccessful if the printer is incompatible with Windows or if there are restrictions on how the printer can be used over a network. If you run into such problems, it is best to talk with your network administrator to get them resolved.

 This tip (10719) applies to Windows 7 and 10.

Author Bio

Allen Wyatt

With more than 50 non-fiction books and numerous magazine articles to his credit, Allen Wyatt is an internationally recognized author. He is president of Sharon Parq Associates, a computer and publishing services company. ...

MORE FROM ALLEN

Determining the Number of Bookmarks Defined in a Document

If you develop a macro that needs to work with bookmarks defined in a document, it is inevitable that you will need a way ...

Discover More

Turning Off Speech Capabilities

Excel can talk to you, reading back whatever you enter into a cell. If you want to turn this capability off, you'll want ...

Discover More

Finding Fields

Fields allow you to add simple dynamic content to your document. Here's how you can find the fields when you need to know ...

Discover More
More WindowsTips

Limiting when Others Can Use Your Shared Printer

Sharing resources on a network can be a great help to everyone. However, you might not want to always make your printer ...

Discover More

Printing a Test Page

Windows includes the ability to print a test page to a printer. This is a good idea when you want to check whether the ...

Discover More

Creating an XPS Document

Creating an XPS document is as easy as printing a document. This tip explains how.

Discover More
Comments

If you would like to add an image to your comment (not an avatar, but an image to help in making the point of your comment), include the characters [{fig}] (all 7 characters, in the sequence shown) in your comment text. You’ll be prompted to upload your image when you submit the comment. Maximum image size is 6Mpixels. Images larger than 600px wide or 1000px tall will be reduced. Up to three images may be included in a comment. All images are subject to review. Commenting privileges may be curtailed if inappropriate images are posted.

What is nine minus 5?

There are currently no comments for this tip. (Be the first to leave your comment—just use the simple form above!)


Newest Tips