When you first install Windows, it tries to cram as much info on the screen as it can at one time. This might make it difficult for you to see things, though. Fortunately, Windows allows you to adjust the size of what it displays.
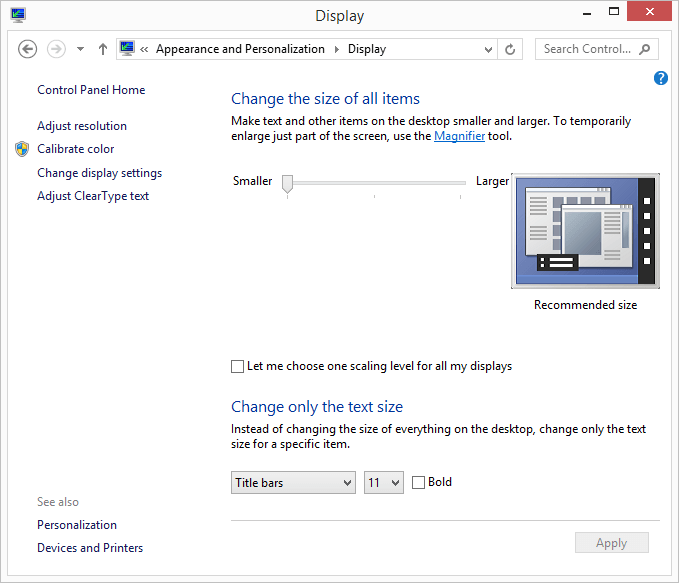
If you are using Windows 7 or 8, follow these steps:

Figure 1. Setting display options in Windows 8.
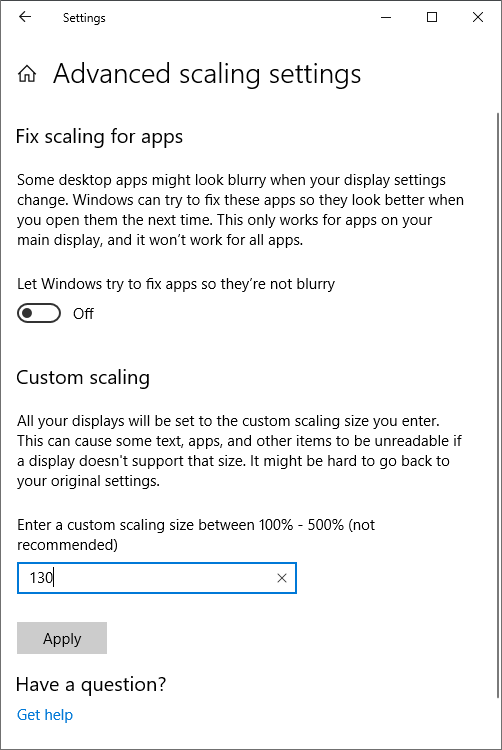
You may have noticed that the slider control only gives you three levels at which items can be displayed. If you are using Windows 10 you have quite a bit more flexibility. Follow these steps:

Figure 2. The Advanced Scaling Settings dialog box.
You can then enter a custom scaling size between 100% and 500% in the box under the Custom Scaling heading. Even though Windows says, "not recommended," I've experienced no ill effects in using this feature of Windows.
When you've typed in the magnification level you want, click Apply to actually change the settings. Windows informs you that you need to log out and back in for the changes to take effect; you can choose to do so at this point or at a later time.
![]()
![]()
![]() This tip (2489) applies to Windows 7, 8, and 10.
This tip (2489) applies to Windows 7, 8, and 10.
Restore Points let you go "back in time" to a point before you made system changes that could prove harmful to your ...
Discover MoreOne of the many functions of the Windows Task Manager is to allow you to see how your system is performing. If necessary, ...
Discover MoreFinding apps to help you with your work or relaxation has never been easier thanks to the Microsoft Store. Quickly look ...
Discover MoreThere are currently no comments for this tip. (Be the first to leave your comment—just use the simple form above!)
Copyright © 2026 Sharon Parq Associates, Inc.
Comments