Previously I introduced the Sticky Notes app found in Windows 10. As discussed in that tip, Sticky Notes is an app that can helpfully reduce desk clutter. When you start to use the additional features of Sticky Notes you can do so much more than you could with pen and paper. Let's take a look.
To get started with Sticky Notes, press the Windows button and type (without quotes) "Sticky Notes," then press Enter. This will open the Sticky Notes application. (See Figure 1.)
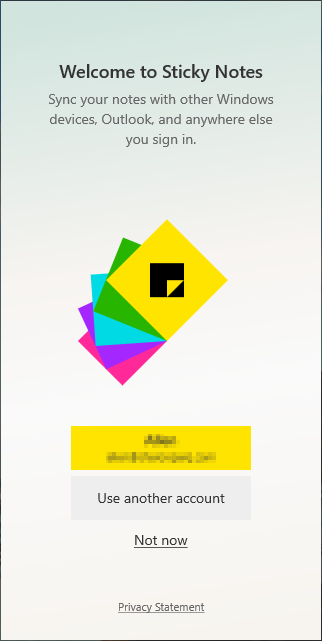
Figure 1. The Sticky Notes app at initial launch.
There are two ways to customize the Sticky Notes app—through the Menu or through the Settings. We'll go through both areas to shed light on what you might use each area for.
Colorizing Your Notes
By default, Sticky Notes creates new notes in yellow. If you would like to use a color other than yellow, whether for personal reasons or you want certain types of notes under the same color, you can. To change the color of a note, activate it by clicking on the note you would like to change. Then click on the Menu icon (the icon looks like three dots) near the upper-right corner of the activated note. This displays the Menu for the note. Here you can choose between seven colors for your note. (See Figure 2.)
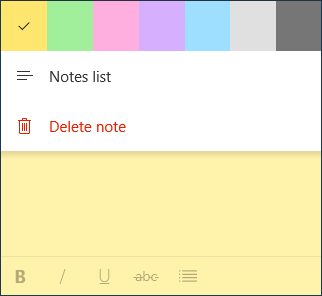
Figure 2. The Sticky Notes menu.
Notes List
The Notes List option in the Menu is to open the Notes List. If you accidently or purposefully close the Notes List, you can open it back up by clicking on this Menu item.
Delete Note
As you are using Sticky Notes, you will notice that the top of an active note contains three icons. To the left is a Plus icon; this will create a new note. On the other side of the note are two more icons. One, as I mentioned earlier, is the Menu icon, and the other is the Close icon. When you click on the Close icon it does simply that—it closes the note; it does not delete the note. To delete a note, you must click on the Menu icon and then choose Delete Note. By default, Sticky Notes will ask if you are sure you want to delete the note. This prompt can be turned off in the Settings of the app.
The Settings window of Sticky Notes allows you to modify settings or features that affect the whole app, features you might find helpful. To access the Settings window, click on the Settings icon (the icon looks like a gear) near the top-right of the Notes List window. (See Figure 3.)
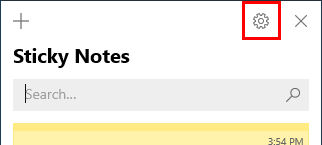
Figure 3. The Notes List with the Settings icon indicated.
This replaces the Notes List window with the Settings window. (See Figure 4.)
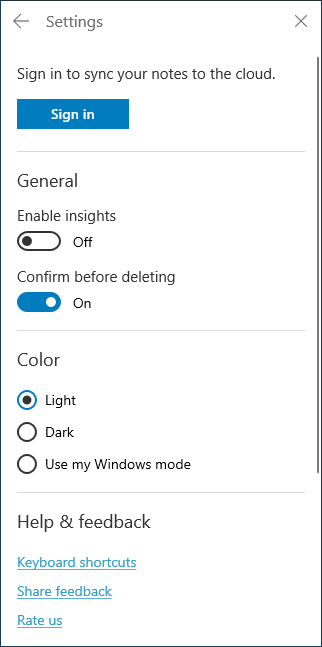
Figure 4. The Sticky Notes app Settings Window.
It is important to note that any time you activate the Settings window for the Sticky Note app, when you are done you click on the back-arrow icon in the top-left corner. Doing so returns you to the Notes List window. Clicking on the "X" instead of the back-arrow icon closes both the Settings window and the Notes List window.
Sign In
When you first launch Sticky Notes, you should have been asked to login to an account. If you chose to not log in at the beginning, but now you want to sync your notes across devices, then you can use this button to sign in. To sign in or change your account click on Sign In to open the Sign In window. (See Figure 5.)
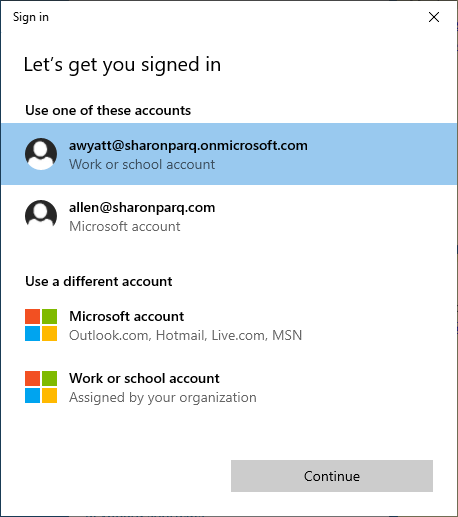
Figure 5. The Sticky Notes Sign In Window.
From there choose the sign in Window that works for you. For me, as you can see, I have four options available—I can sign in using one of two previously used accounts, or I can login using another Microsoft Account or sign in using a Work or School Account. Choose your option then click on Continue to complete signing in.
Insights
One of the most powerful features of Sticky Notes is Cortana Insights, or simply referred to as Insights. With Insights turned on, your computer creates actions for you depending on the content of your note. To turn on Insights, follow the steps above to open the Settings window. When you have the Settings open, under the General section click on Enable Insights. Then press the back-arrow icon. Cortana starts looking at your notes for possible reminders. Cortana will look for addresses, phone numbers, URLs, dates, and more. (See Figure 6.)
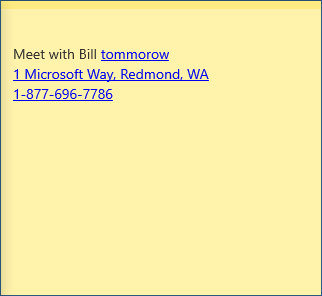
Figure 6. A note with a possible Cortana reminder.
To set the reminder, click on the note to activate it. Then click an underlined item you wish to set. The note will show an Add Reminder button to the bottom of the note. Clicking this button opens the Reminder in the start menu. (See Figure 7.)
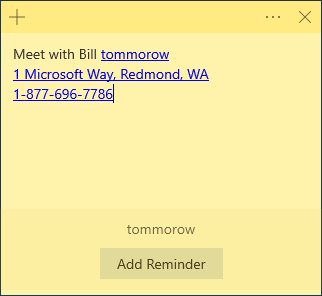
Figure 7. A note with the Add Reminder button.
The reminder will be populated with the information you typed in your note. You can edit the information if you desire. If all of the reminder information is correct, click on Remind to create the reminder. (See Figure 8.)
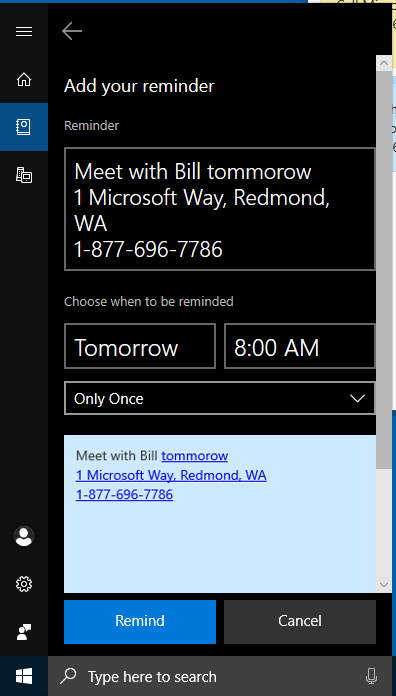
Figure 8. Cortana asking you to confirm your options for reminding you.
Confirm before Deleting
As I mentioned above, when you delete a note through a note's Menu, you will be prompted to confirm if you are sure you wish to delete the note. While this is a helpful precaution, as you start using notes more and more, being asked every time if you wish to delete a note can grow tiresome. By turning off this setting you will no longer be asked to confirm your choice.
Dark Mode
Windows offers dark mode for many of their modern apps. Dark mode replaces the typical bright colors with a darker color (typically a shade of black) that can help reduce eye strain and fatigue. You can activate dark mode for the Stick Notes app within the Settings window. When selected your notes will have a dark gray color with the "color" of the note at the top of the note. (See Figure 9.)
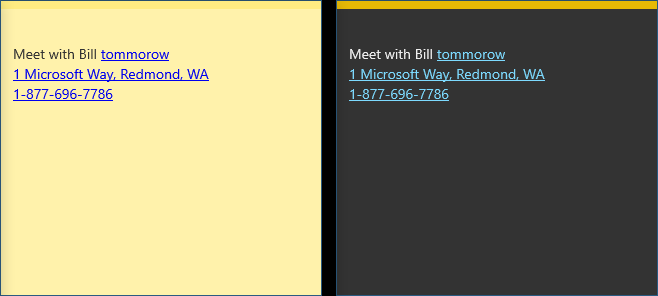
Figure 9. A light Sticky Note compared with a dark Sticky Note.
As you can see, there are several features available both through the Menu and Settings portions of the Sticky Notes app. By learning the options available to you, you can turn Sticky Notes into one of your most helpful apps.
![]() This tip (13623) applies to Windows 10.
This tip (13623) applies to Windows 10.
Windows 10 has a built-in Contact Support app that you can use to look up possible answers to issues you're having and ...
Discover MoreMicrosoft's Power Automate is a powerful feature that can reduce the tedium involved with performing repetitive tasks. ...
Discover MoreHaving trouble seeing everything in Windows? Is the type or other objects simply too small? Here are some cool ways to ...
Discover More2019-02-18 16:30:00
MW
Both of your Sticky Notes tips are incredibly useful and convenient.
Who knew?
Thanks for the tip.
Copyright © 2024 Sharon Parq Associates, Inc.
Comments